Prototyping Cost Reduction Strategies 101


Why Prototyping Cost Reduction Strategies Matter for Manufacturers
Prototyping cost reduction strategies are methods used during product development to lower the expense of building and testing prototypes without sacrificing quality or speed. Here is a quick overview of the most effective approaches:
- Apply Design for Manufacturability (DFM) early — Up to 80% of a product's total cost is locked in during the design phase, so early optimization has the greatest impact.
- Choose the right prototyping method for each stage — Use low-cost methods like 3D printing for early concepts, then move to CNC machining or rapid tooling for functional validation.
- Optimize tolerances — Relaxing tolerances by just 10% can reduce manufacturing costs by up to 20%.
- Use aluminum or soft tooling instead of steel molds — Aluminum molds can cost 60% less upfront than steel and still support thousands of production cycles.
- Standardize and consolidate parts — Reducing part count and using standard components can cut costs by up to 50%.
- Build in small batches — Iterating in batches of 3–10 units prevents large-scale waste before a design is validated.
- Use digital twins and simulation — Virtual testing with tools like FEA or CFD reduces the number of physical prototypes needed.
Prototyping is one of the most budget-intensive phases of product development. For automotive and hardware manufacturers, the stakes are especially high. A single month of delays or a poorly chosen tooling method can ripple across the entire development timeline — straining budgets, pushing back launches, and putting competitive advantage at risk.
The challenge is not simply spending less. It is spending smarter — knowing which methods, materials, and design decisions deliver the most value at each stage of development.
I'm Yoshihiro Hidaka, founder of Hidaka USA, Inc., where I have spent over three decades applying prototyping cost reduction strategies in sheet metal fabrication and automotive prototype supply. That hands-on experience — from early-stage concept parts to mass production — shapes every recommendation in this guide.
Prototyping cost reduction strategies word guide:
Understanding the Main Cost Drivers in Prototype Development
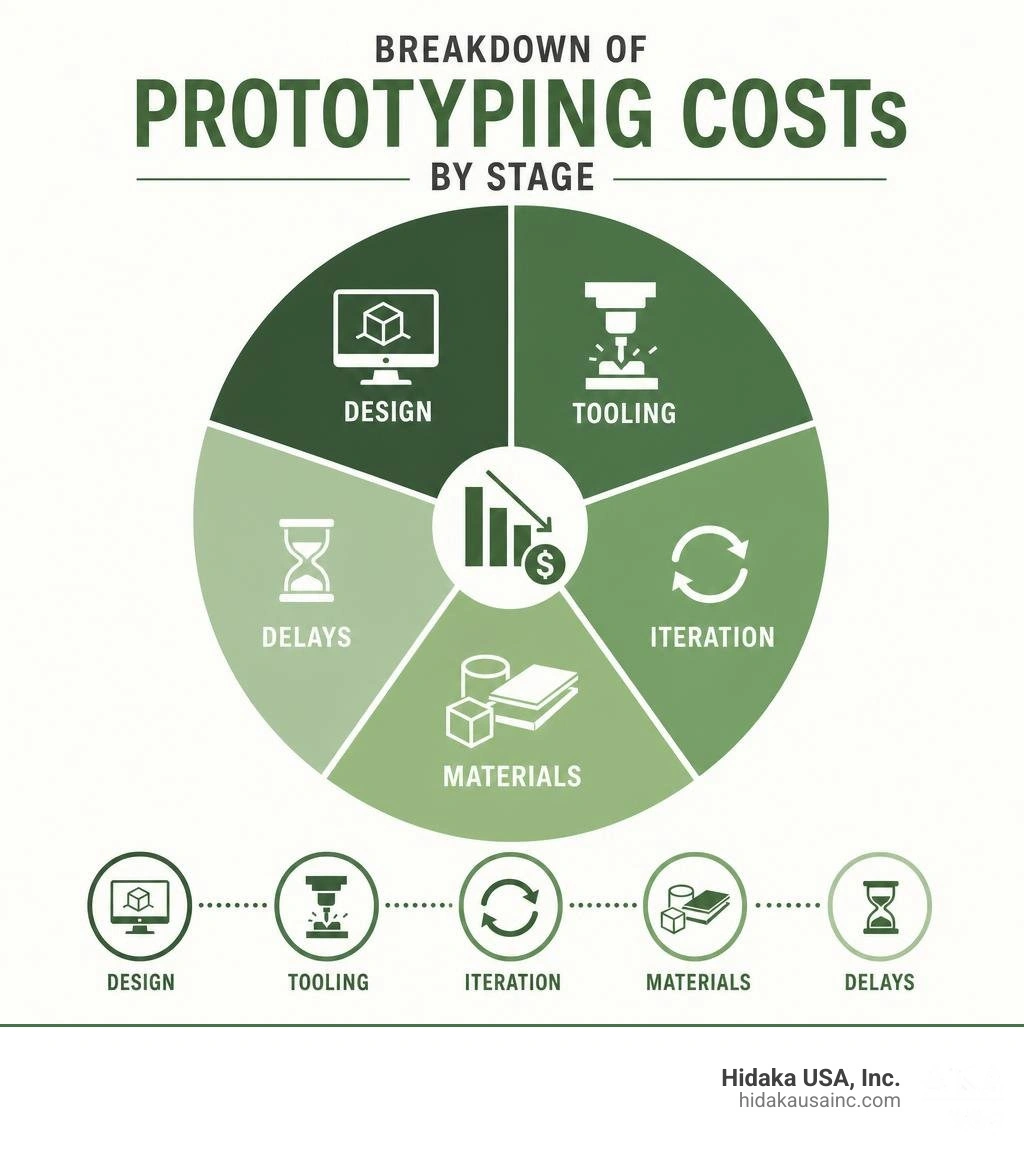
To build an effective strategy for optimizing your budget, we must first look at where the money actually goes. Prototype development costs are rarely driven by material volume alone. Instead, they are dictated by design complexity, manufacturing processes, tooling requirements, and the number of physical iterations required before a design is finalized.
In hardware and automotive engineering, the design phase is the single most powerful lever for cost control. This is known as the "80% rule": up to 80% of a product’s total manufacturing and development cost is locked in during the very first design stages. Once a CAD model is completed and sent to the shop floor, the cost baseline is largely set. If the design includes unnecessary complexities or highly specialized features, those costs will compound with every single prototype built.
When design challenges or manufacturing errors are discovered late in the cycle, they lead to prototype delays. For startups and mid-sized firms operating on tight budgets, these delays are more than just scheduling inconveniences — they are direct drains on vital capital.
The Hidden Costs of Prototype Delays and Timeline Slippage
Timeline slippage is one of the most destructive hidden costs in hardware development. When a prototype cycle runs over schedule, the financial impact extends far beyond the engineering hours spent fixing the design.
First, delays directly threaten market share. In fast-moving industries like automotive technology, consumer electronics, and medical devices, being first to market is a major competitive advantage. Launching even a couple of months late can allow competitors to capture the target audience, leaving your team to play catch-up.
Second, for early-stage companies, delays can severely impact funding milestones. Hardware startups often rely on working prototypes to secure follow-up investment rounds. If a prototype cycle drags on, the likelihood of securing critical funding decreases, as investors lose confidence in the team's execution speed.
Finally, prolonged prototyping cycles lead to team burnout. When engineers are forced to repeatedly redesign, rebuild, and retest parts due to late-stage manufacturing errors, morale drops. This friction can be significantly mitigated by adopting structured strategies early on. To explore how design and engineering firms manage these challenges, read about How to Quickly Cut Prototype Design Costs in 2026.
Implementing Design for Manufacturability (DFM) for Prototyping Cost Reduction Strategies
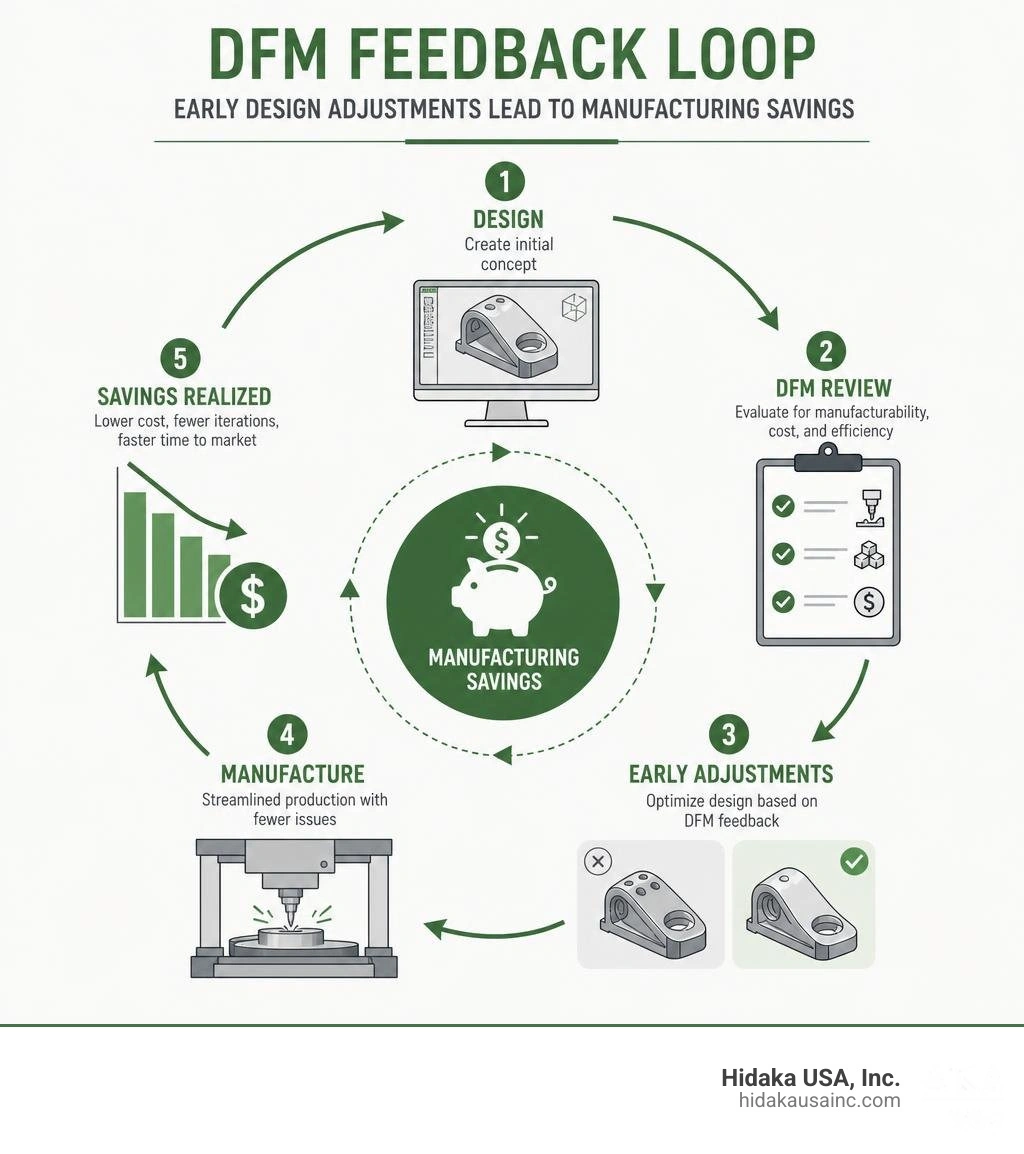
Design for Manufacturability (DFM) is the practice of designing parts specifically to make them easier and more cost-effective to manufacture. Instead of designing a part in a vacuum and throwing it "over the wall" to the fabrication team, DFM integrates manufacturing constraints directly into the CAD workspace.
When applied correctly, DFM typically reduces manufacturing costs by 15% to 30% without compromising the product's final functionality. It achieves this by identifying costly design features — such as hard-to-machine geometries, non-standard materials, or excessive assembly steps — before any physical tooling is cut or material is purchased.
Tolerance Optimization and Geometry Simplification
One of the most common mistakes in prototype design is over-tolerancing. It is tempting for engineers to apply tight tolerances to every dimension of a CAD drawing to "be safe." However, tight tolerances drive up manufacturing costs exponentially. They require slower machining speeds, specialized cutting tools, climate-controlled inspection environments, and sometimes 100% manual quality checks.
A highly effective rule of thumb is the "10% rule": making tolerances less strict by just 10% can lower manufacturing costs by up to 20% in precision applications. Smart engineering means specifying the loosest possible tolerances that still maintain the part’s fit, form, and mechanical function. Tight tolerances should only be reserved for critical mating surfaces or dynamic interfaces.
Geometry simplification works hand-in-hand with tolerance optimization. Complex shapes with deep pockets, sharp internal corners, or non-orthogonal features require specialized multi-axis CNC machines or complex setups. By designing parts with consistent wall thicknesses, generous draft angles, and standard internal radii, you allow the fabrication team to use standard tooling at much higher speeds. For deeper insights into how machining setups and geometry impact your budget, check out our More info about prototype machining services.
Design Standardization and Component Consolidation
Standardization is another cornerstone of cost-effective prototyping. Whenever possible, we should design assemblies using standard, off-the-shelf components rather than custom-fabricated parts. Standard fasteners, brackets, bearings, and electronic modules are produced in massive volumes, making them incredibly cheap and readily available.
Standardizing components across your product lines can cut development and inventory costs by up to 50%. It simplifies the supply chain, reduces the number of unique parts that must be tracked, and eliminates custom tooling requirements.
Modular design is an extension of this strategy. By breaking a complex system down into standardized modules, you can isolate high-risk features and prototype them independently. This prevents you from having to rebuild an entire assembly when only one specific component needs refinement. For advanced engineering support in standardizing and optimizing complex assemblies, you can find More info about advanced prototype engineering services.
Choosing the Right Prototyping Method by Stage and Budget
Product development is a journey, and the prototyping methods you use should change as you move from concept to production. Using a high-fidelity, expensive manufacturing method to test a simple ergonomic concept is a waste of resources. Conversely, relying on low-fidelity methods for final functional testing can lead to catastrophic failures in the field.
To maximize your budget, match the prototyping method to the specific validation question you need to answer.
| Prototyping Stage | Primary Objective | Recommended Method | Relative Cost | Lead Time | Typical Volume |
|---|---|---|---|---|---|
| Concept Validation | Form, fit, and basic ergonomics | 3D Printing (FDM, SLA) | Very Low | 1–3 Days | 1–5 units |
| Functional Validation | Mechanical strength, thermal properties | CNC Machining, SLS/MJF Nylon | Moderate | 3–7 Days | 5–10 units |
| Pre-Production / Pilot | Assembly validation, regulatory testing | Vacuum Casting, Soft Tooling | High | 2–4 Weeks | 10–100 units |
| Production-Intent | Final validation, market testing | Rapid Injection Molding, Hard Tooling | Very High | 4–8 Weeks | 100–1,000+ units |
Low-Fidelity vs. High-Fidelity Prototyping Cost Reduction Strategies
Early-stage prototypes should focus entirely on speed and basic validation. Low-fidelity prototyping methods, such as basic FDM (Fused Deposition Modeling) 3D printing, are incredibly cost-effective. They allow you to hold a physical representation of your design in your hands within hours, helping you catch glaring design flaws before spending significant capital.
As the design matures, you must transition to high-fidelity prototyping methods like CNC machining, sheet metal fabrication, or rapid injection molding. High-fidelity prototypes use production-intent materials to simulate the exact mechanical, thermal, and cosmetic properties of the final product.
The key to cost reduction here is "fidelity matching." Do not use high-fidelity methods until the core design has been thoroughly validated using low-fidelity models. For a comprehensive breakdown of these methods, read our More info about rapid prototyping processes.
Virtual Prototyping and Digital Twin Simulations
One of the most effective ways to cut physical prototyping costs is to avoid building them altogether in the early stages. Virtual prototyping — using digital twins and advanced engineering simulations — allows you to test your designs in a virtual environment.
Using Finite Element Analysis (FEA) and Computational Fluid Dynamics (CFD), we can simulate structural stress, thermal distribution, vibration, and fluid flow in a matter of hours.

Virtual testing is highly cost-effective because it allows you to run dozens of design iterations and "drop tests" without damaging physical models or wasting raw materials. It ensures that when you finally do transition to physical prototyping, your design is already highly optimized, reducing the number of physical iterations required. To learn more about balancing virtual and physical testing, read How to Reduce Your Prototype Cost Without Sacrificing Quality.
Rapid Injection Molding and Tooling Strategies for Startups
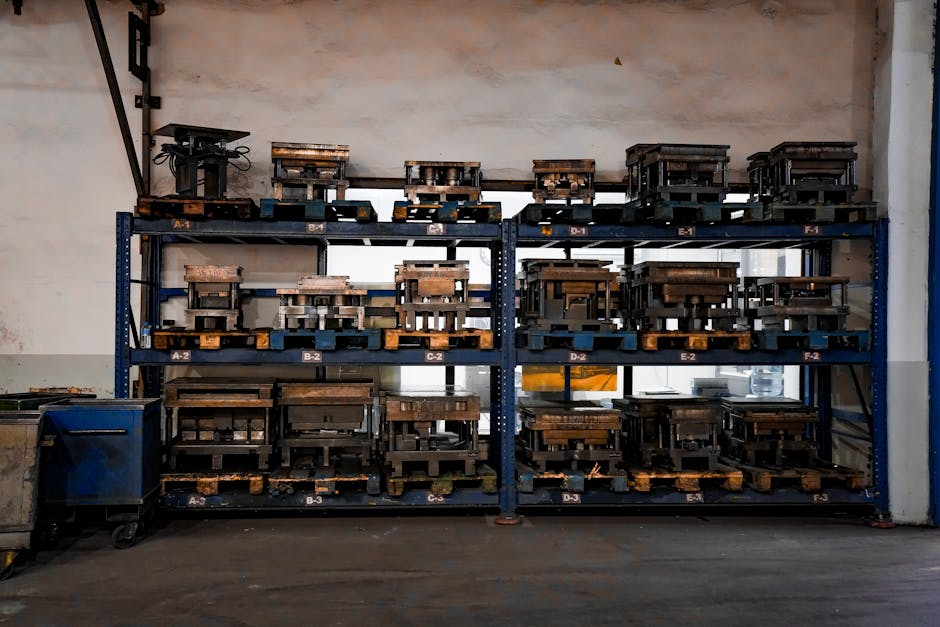
When your product requires molded plastic parts, transitioning from 3D printing to injection molding can feel like a massive financial hurdle. Traditional steel molds require significant capital investment and weeks of precision machining.
This is where rapid injection molding and rapid tooling become major assets for startups. By using simplified mold designs and softer mold materials, rapid injection molding allows you to produce functional, production-grade plastic parts at a fraction of the cost and time of traditional methods.
Cost-Effective Tooling: Aluminum Molds, Soft Tooling, and Family Molds
For low-to-mid volume production runs (typically between 500 and 5,000 units), aluminum molds — often referred to as soft tooling — are incredibly cost-effective. Aluminum has several distinct advantages over tool steel:
- Lower Machining Costs — Aluminum is much softer than steel, allowing CNC machines to cut the mold cavities up to 60% faster, which directly translates to lower tooling costs.
- Superior Thermal Conductivity — Aluminum dissipates heat much faster than steel. This enables 20% to 30% faster cooling cycles during molding, reducing production time and per-part costs.
- Sufficient Durability — Modern, high-grade aluminum molds can easily withstand 5,000 to 10,000 injection cycles when molding non-abrasive resins, which is more than enough for prototype validation and early market entry.
Another excellent strategy is the use of family molds. A family mold contains multiple different cavity shapes within a single mold base, allowing you to mold several distinct parts of an assembly in a single press cycle. This eliminates the need to build separate mold bases for every single plastic part, saving significant tooling capital. To see how startups utilize these tooling methods to reduce development costs by up to 40%, read the detailed guide on Cost-Effective Rapid Injection Molding Prototyping.
Metal Prototyping Cost Reduction Strategies for Hardware Startups
If your product relies on structural metal components, the prototyping challenges are slightly different. Metal parts often require high strength, precise tolerances, and excellent surface finishes, which can make prototyping expensive if not managed correctly.
For metal prototyping, sheet metal fabrication and rapid metal tooling are highly cost-effective options. Using advanced 2D/3D laser cutting, precision hydraulic pressing, and modular stamping dies, we can produce highly accurate metal prototypes without the astronomical costs of dedicated mass-production stamping tools.
By utilizing modular tooling systems with standardized base plates and interchangeable inserts, we can quickly form complex brackets, enclosures, and structural parts. This approach allows hardware startups to validate their metal designs using production-intent materials (such as high-strength steel or aluminum alloys) while keeping tooling investments minimal. For more tailored strategies on metal development, explore our More info about metal prototyping for startups and get More info about prototype sheet metal fabrication.
Frequently Asked Questions about Prototyping Cost Reduction
What is rapid injection molding prototyping and how does it differ from traditional methods?
Rapid injection molding prototyping is a bridge between rapid prototyping (like 3D printing) and high-volume production. It uses simplified mold designs, standard mold bases, and softer materials (like aluminum) to quickly produce functional plastic parts.
Unlike traditional injection molding, which uses hardened steel molds, takes weeks to fabricate, and requires a large upfront capital investment, rapid injection molding can deliver production-quality parts in a matter of days at a fraction of the tooling cost. It is ideal for functional validation, regulatory testing, and early pilot runs.
How can startups use rapid injection molding to reduce development costs by up to 40%?
Startups can achieve up to 40% cost savings by leveraging aluminum molds, family molds, and early DFM feedback. Aluminum tooling reduces upfront mold-making costs by up to 60% compared to steel.
Additionally, family molds allow startups to produce multiple different parts of an assembly in a single shot, cutting down on the number of individual molds required. By combining these tooling savings with early DFM analysis to simplify part geometries, startups can compress their development budgets and accelerate their time-to-market.
When should a company transition from 3D printing to CNC machining or rapid tooling?
The transition depends on your validation goals and production volume:
- 3D Printing is best for early concept validation, form-fit checks, and low-volume cosmetic models (1–10 units).
- CNC Machining is the right choice when you need to test functional, high-strength parts using production-intent metals or plastics (5–50 units) without investing in tooling.
- Rapid Tooling / Injection Molding becomes the most cost-effective option when your design is locked, you need to validate the actual molding process, or your required volume exceeds 50 to 100 units. Beyond this volume, the per-part cost of injection molding is significantly lower than CNC machining or 3D printing, quickly offsetting the initial tooling investment.
Conclusion
Optimizing your prototyping budget is not about cutting corners; it is about making smart, data-driven decisions from the very first CAD sketch. By applying Design for Manufacturability (DFM) early, choosing the right prototyping methods for each stage, optimizing tolerances, and leveraging rapid tooling strategies like aluminum or family molds, you can significantly reduce development costs while actually accelerating your timeline.
At Hidaka USA, Inc., we have been helping manufacturers navigate these critical transitions since 1989. From our 95,000-square-foot facility in Dublin, Ohio, our experienced engineering team provides end-to-end support — combining advanced 2D/3D laser cutting, hydraulic pressing, and AWS-certified welding to deliver high-quality, American-made prototypes.
Whether you are a startup validating a new hardware concept or an established automotive OEM preparing for mass production, we hold ISO 9001 certification to ensure your parts meet the strictest quality control standards.
Ready to optimize your next project? Start your prototyping project with Hidaka USA today, or explore our services for mass production to see how we can support your product lifecycle from concept to delivery on our homepage.